What`s it for?
In fluorescence microscopy, samples (biological cells) are typically either kept at room temperature or heated to approx. 37°C.
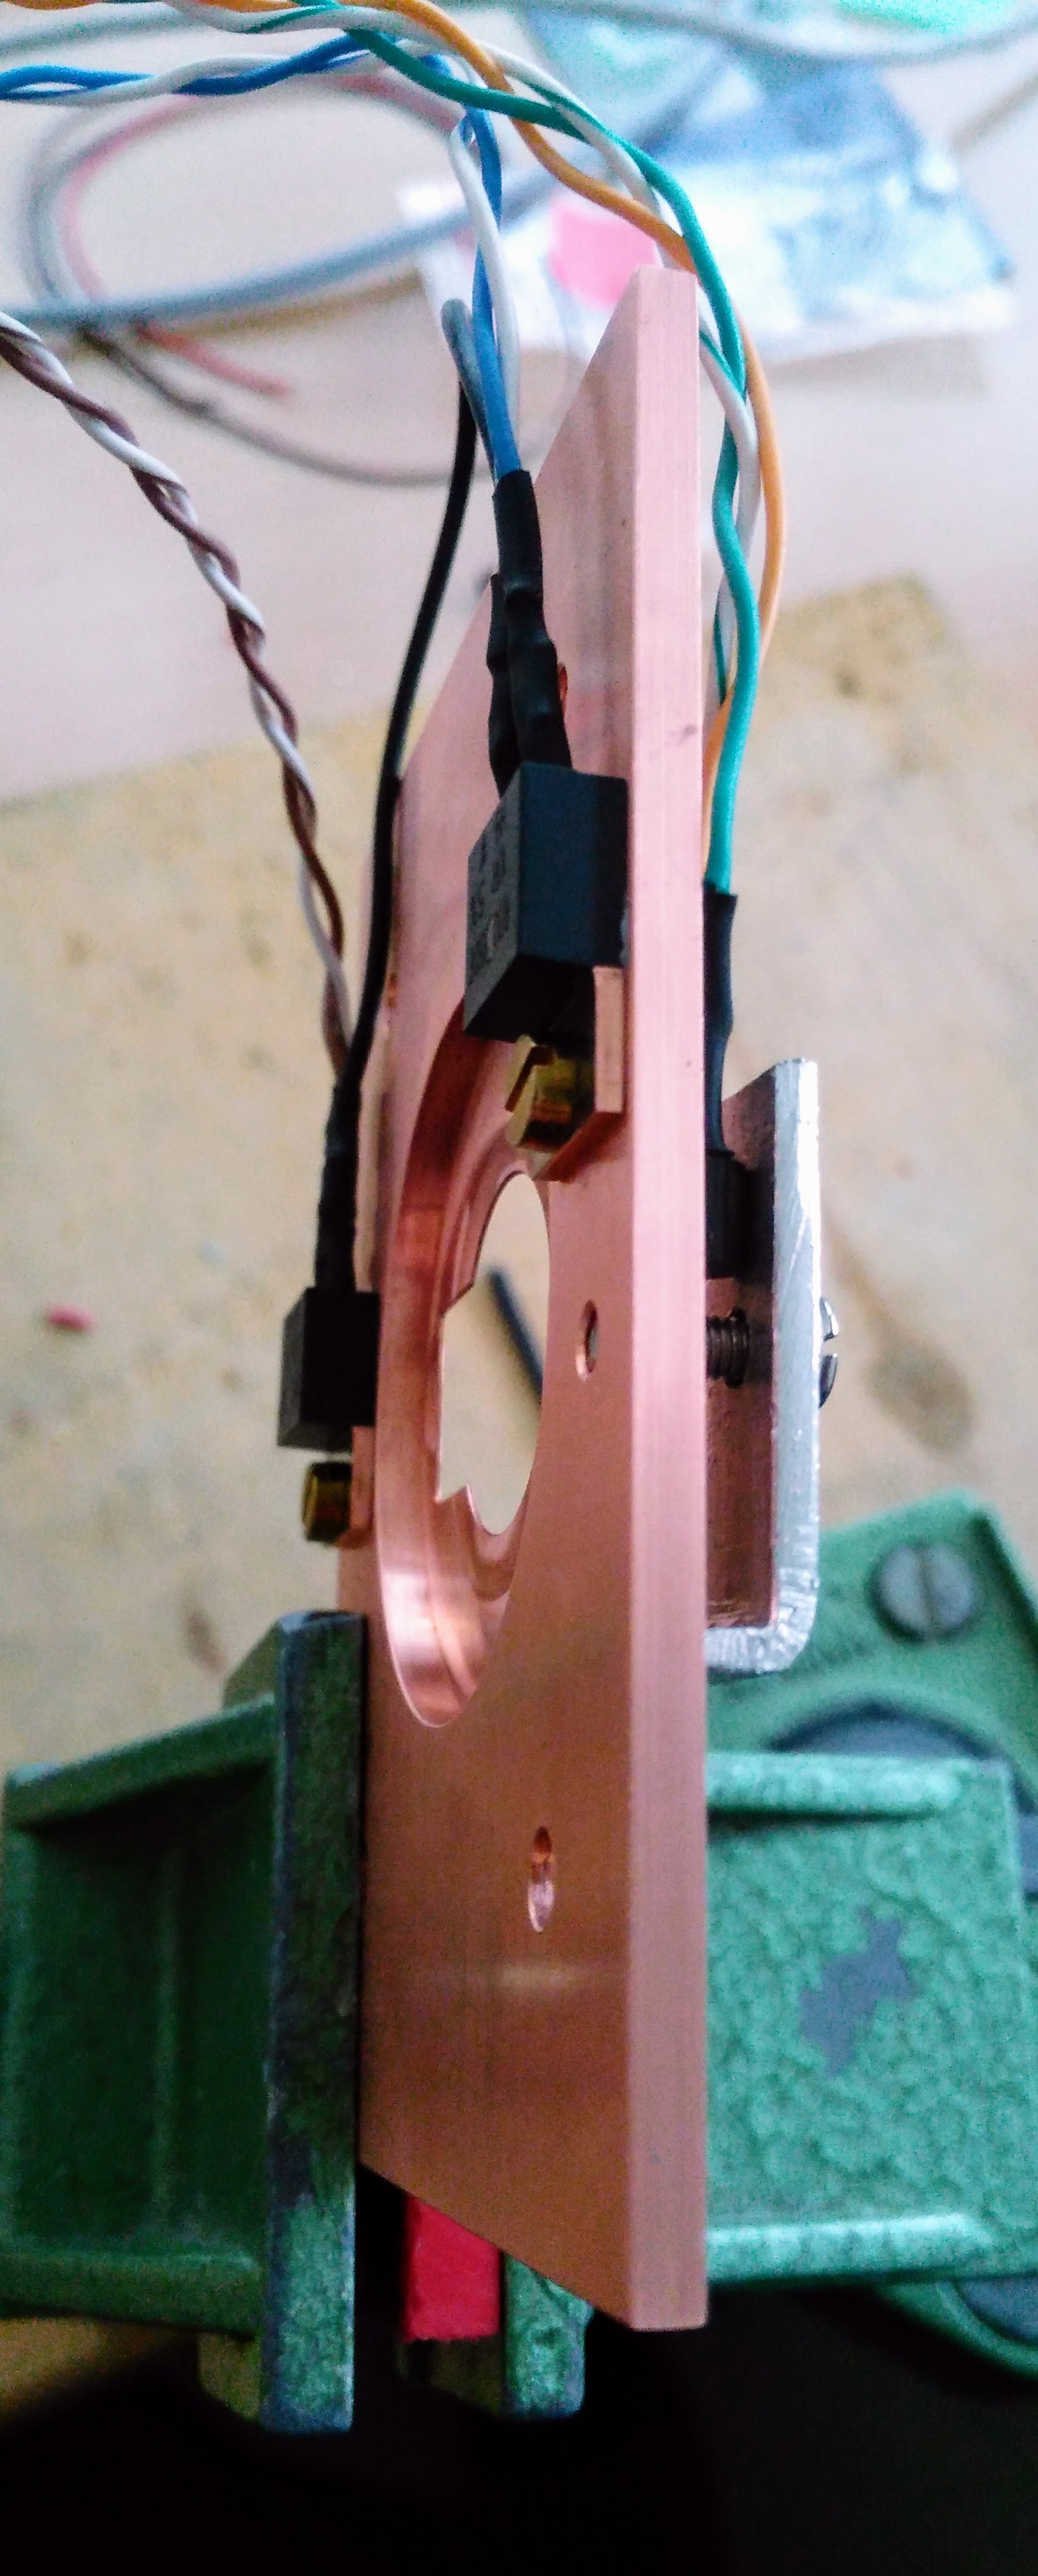
For a prototype microscope, we needed a quick and vibration-free way to heat the stage (a copper plate holding the sample) to these 37°C.
The whole project took a day to build, and even longer to document here :). It uses standard, off-the-shelf components around an Arduino Uno.
Raw files for code and schematics can be found here on github. Also, me and the Biomolecular Photonics group at Bielefeld University.
Photos
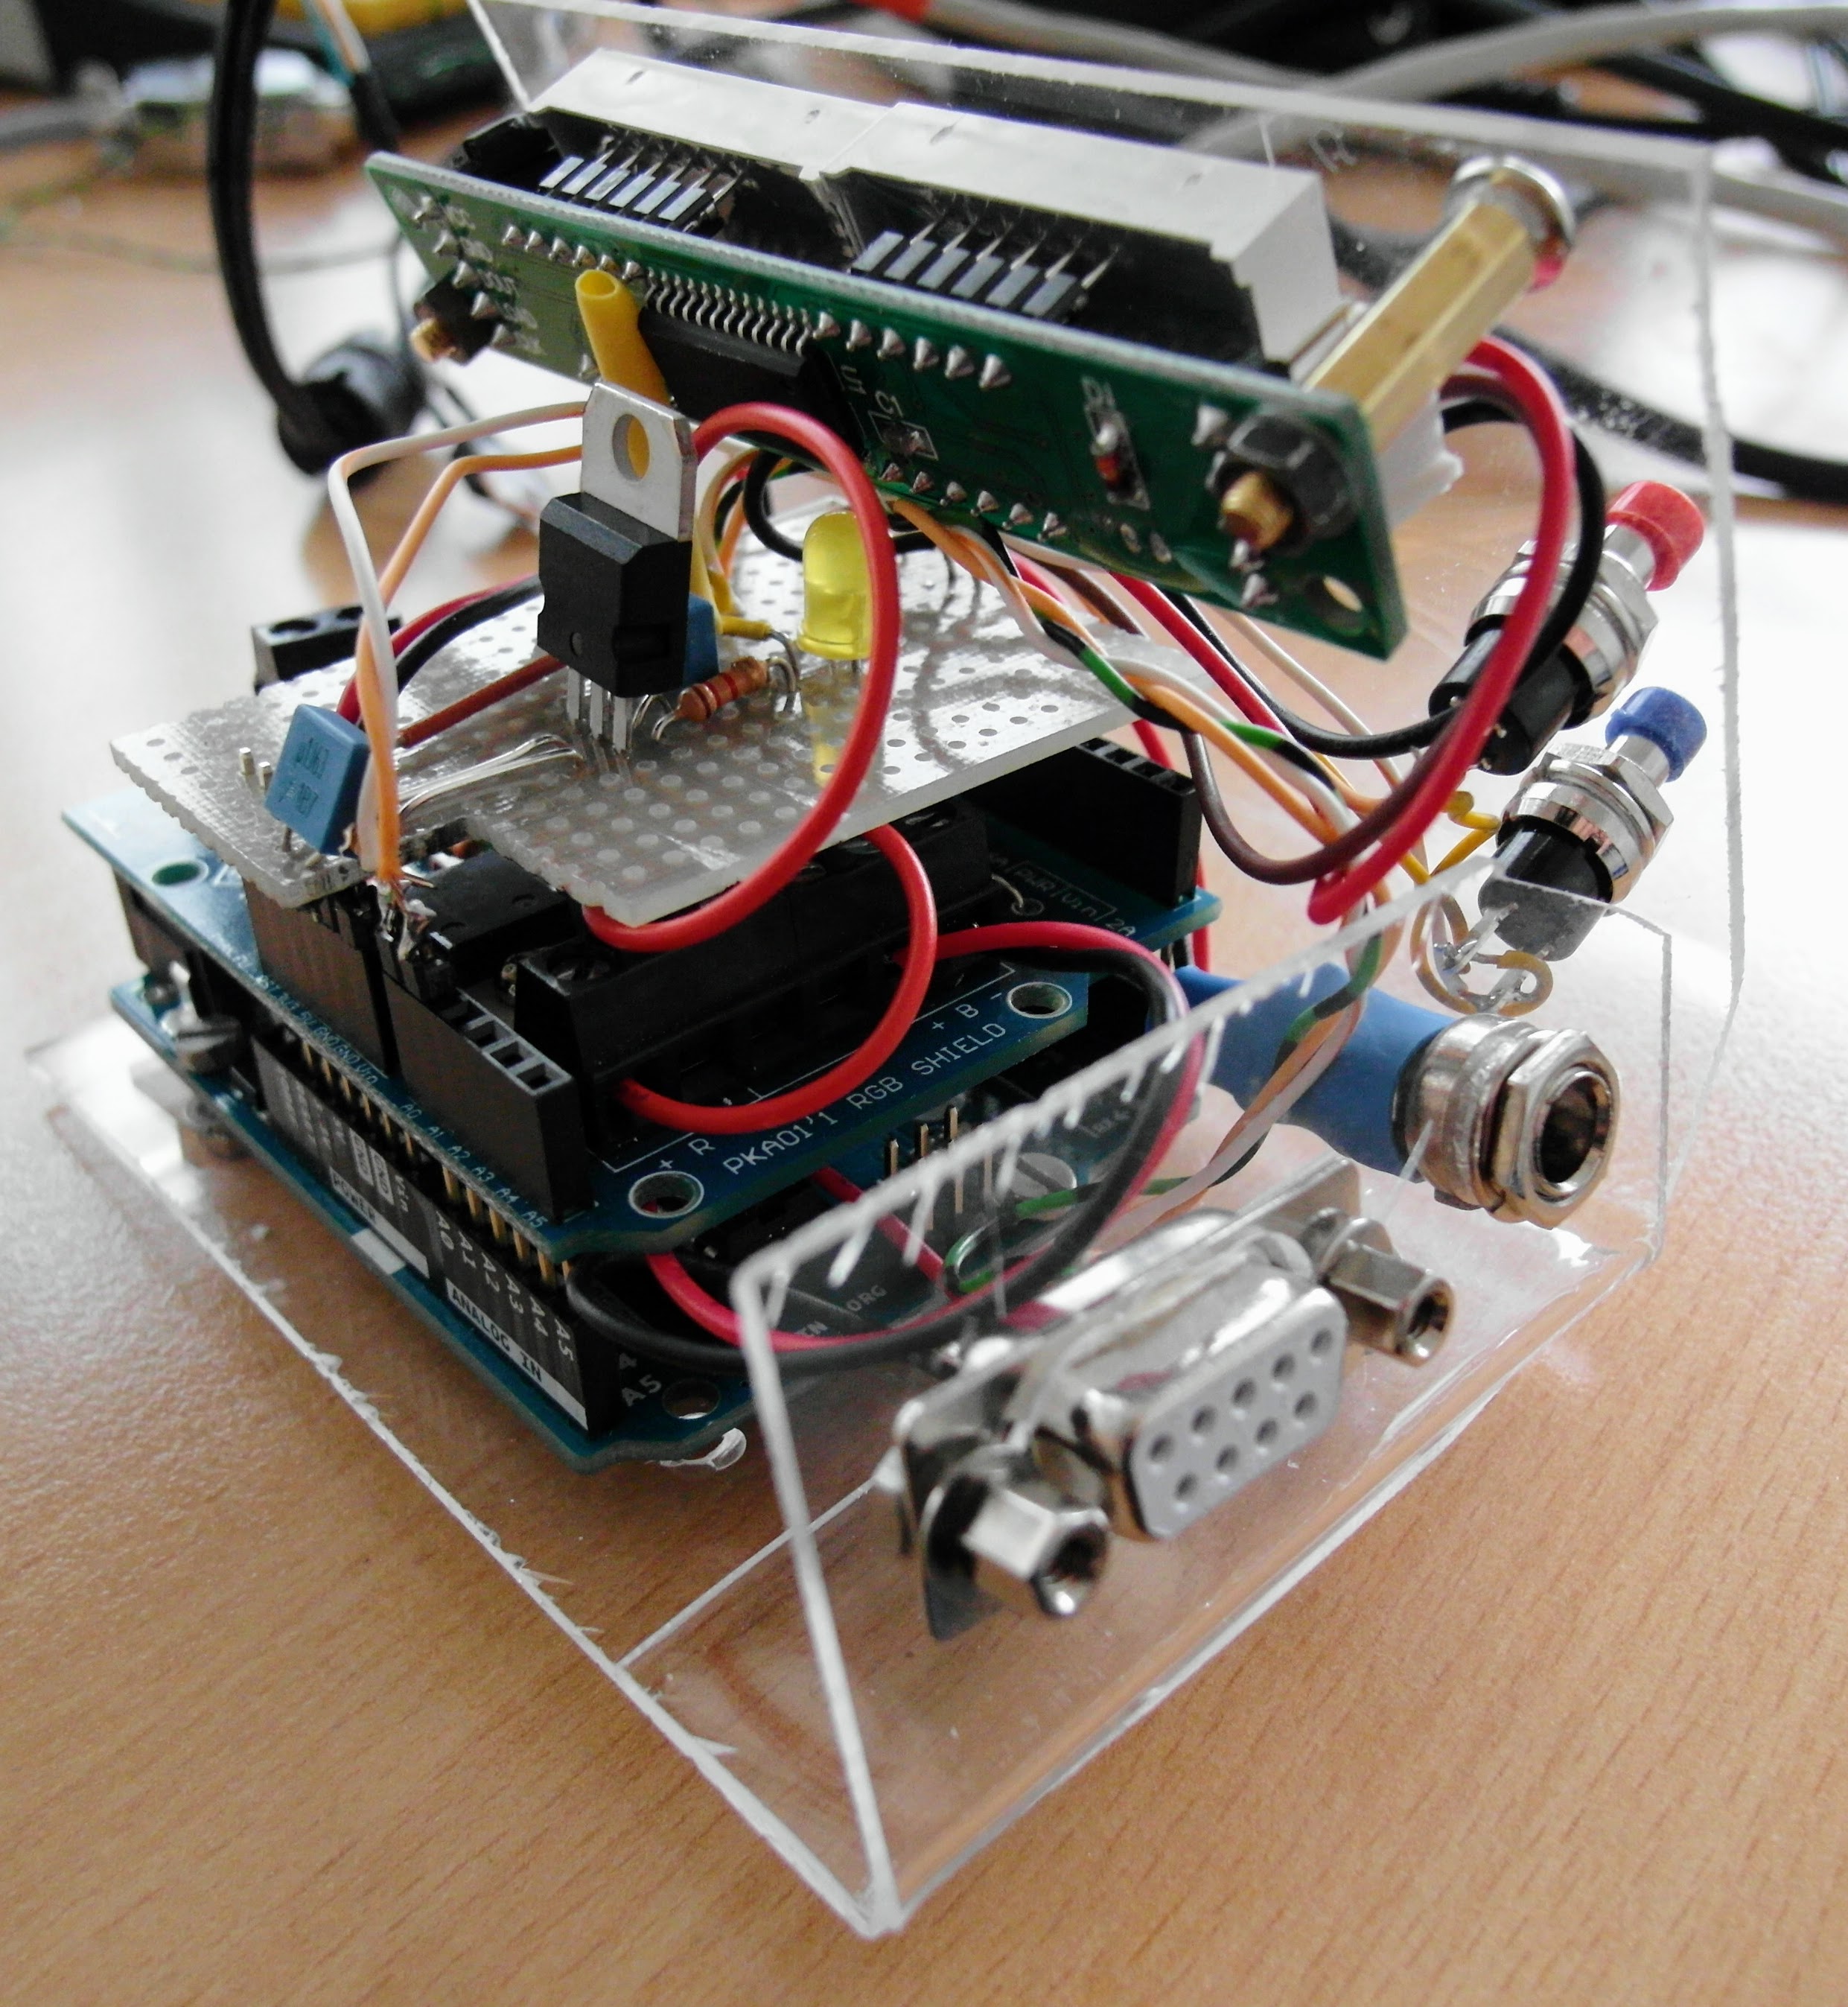
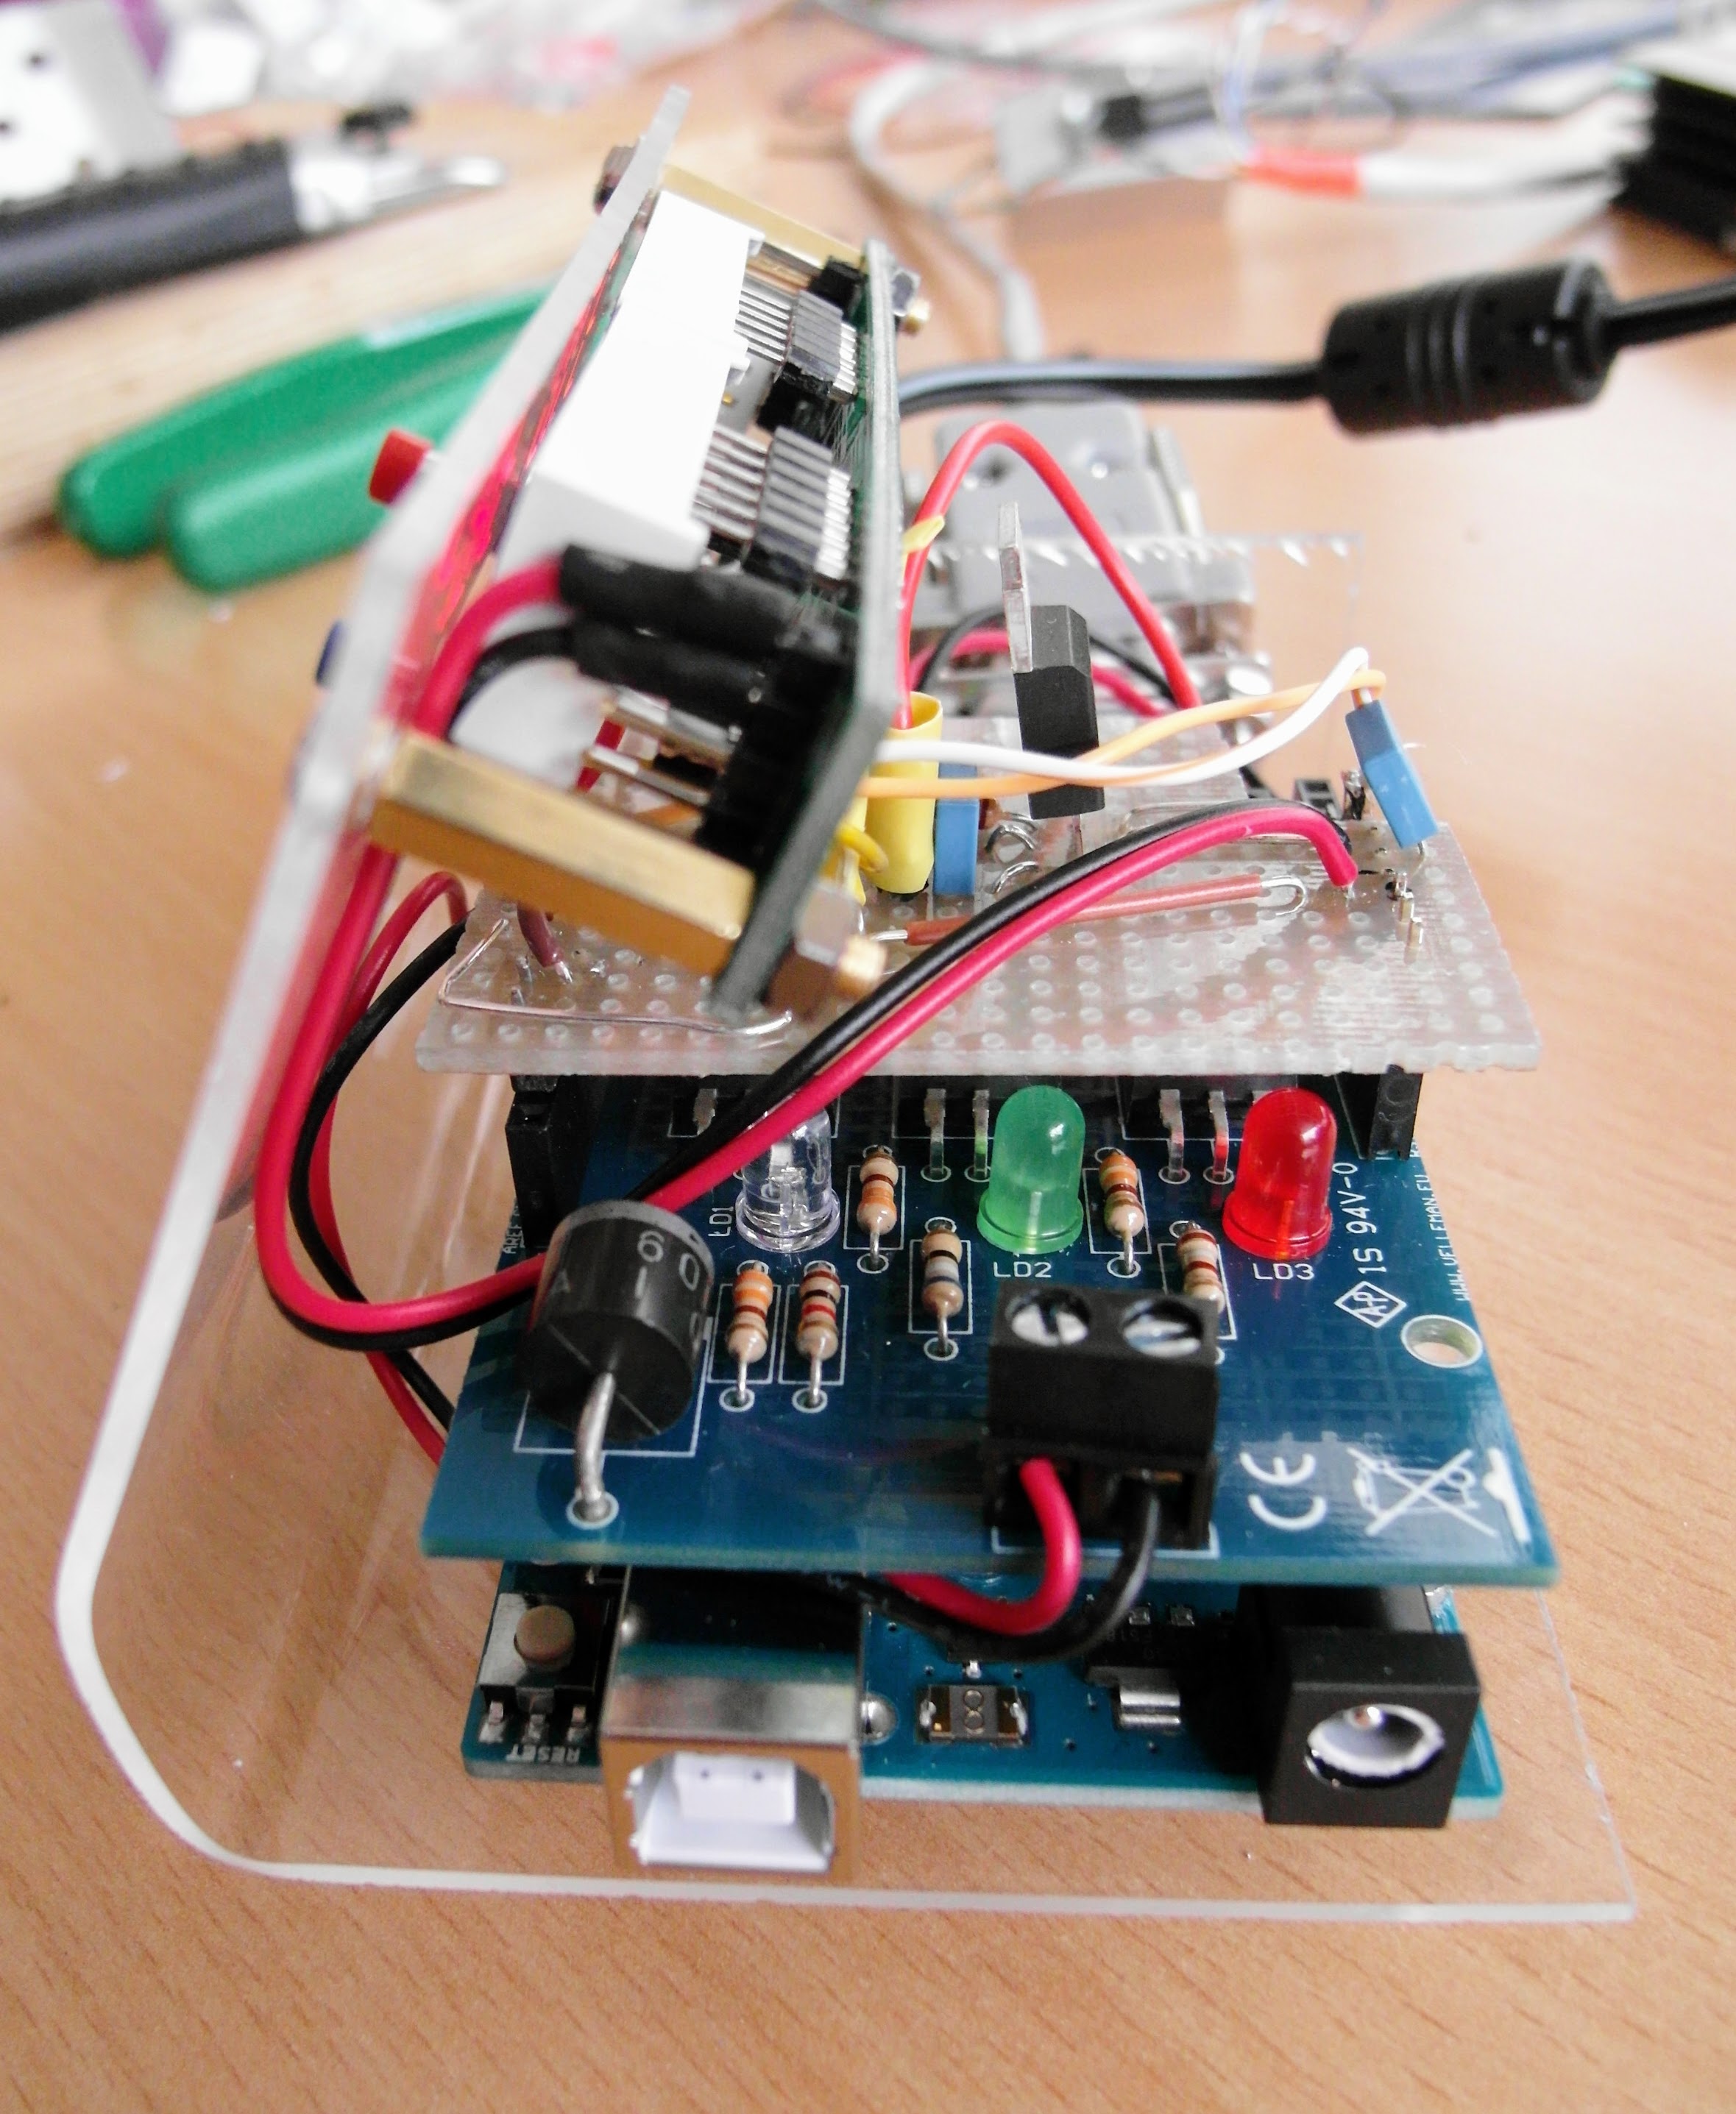

Looks like it was put together in a days work, doesn`t it?
Materials
- Sample holder, in our case a copper plate
- 2x 10 Ohm resistors, TO-220 case (e.g. digikey, reichelt)
-
DS18S20 or DS18B20 digital temperature sensor ( DS18S20, DS18B20, reichelt)
- Arduino Uno (or compatible)
- Maxim-7219-based 8x 7-segment LED display (see e.g. here, amazon)
-
2x push button switches
- 24V power supply, 1.5A or more
- Connectors, e.g. D-SUB 9 and barrel connector matching power supply
- 7812 linear voltage regulator, with capacitors
-
An LED, resistors 1k, 4.7k, cable to connect stage and controller
- Some form of case, we just used a sheet of acrylic glass
Depending on where you order, the bill of material (excluding the sample holder) should run around 75€ (last checked 2017-03-06).
Schematics

These were drawn to learn a bit how to operate KiCad EDA, the raw files are here.
Building and using it
- The TO-220 resistors and the temperature sensor are fixed to the stage (use heat-conductive paste for thermal coupling). Put some distance between the sensor and the resistors.
- The resistors are wired in series, so they yield 20 Ohm. The sensor is wired separately (as they share neither ground nor VCC).
-
The RGB shield is set to “external power”, and powered by the 24V supply. The resistors are connected to the blue channel.
-
The 7812 regulator down-converts 24V to 12V, as the Arduino should not be powered from 24V directly. It sits on a small hand-wired circuit board on top, with a control LED on the 12V side. It feeds into the ‘VCC’ pin of the Arduino (do not use the +5V pin!)
- The push buttons are connected to A0 and A1, and short to ground when closed. The internal pull-up resistors are used on these pins.
- The display connects to pin 8 (data), pin 9 (clock), pin 13 (device select). It is powered off the +5V supply by the Arduino (do not use +12V or +24V!). It uses the LedCotrol library, as it is based on an MAX7219.
-
The DS18?20 is connected to pin 11, pulled to +5V by a 4.7k resistor. It also connects to +5V and ground. It uses the OneWire library.
- We just used a heat-bended sheet of acrylic glass to fix all components. Of course any case should do.
With the current code:
- The push buttons adjust target temperature (+/- 0.1 °C)
- The right numbers show the current temperature (as measured by the DS18?20)
- The left numbers alternate between target temperature and heating power (in percent, postfixed by ‘H’).
- Each measurement is also printed to the serial port
- The code is work-in-progress, it will get a more proper feedback mechanism in the next days.
Remarks and possible improvements
- Component choices are out of convenience, parts can easily be substituted
- The RGB shield is just 3 logic-level MOSFETs, and only one is used.
- Any Arduino-compatible display (LED, LCD, OLED) should do, the MAX7219-based just was at hand.
- Adding a heat sink to the 7812 is a good idea (or replacing it with something more modern than a linear regulator). Otherwise, limit the 12V and 5V rails to maybe max. 90mA in total.
- More DS18?20 can be daisy-chained to provide multiple measurements
- Running 28W (20Ohm at 24V) gives plenty of heat for a 6cm x 6cm stage. Sustaining 37°C runs at about 20% power
- Adding a cover will greatly improve and even out the temperature in the sample (though the stage itself already helps a lot).
- With bigger power supply, 3x 2A current at 24V are available. Thats up to 144W, so plenty of power!
Comments
If you find the project useful, or have add-ons or suggestions, just send an e-mail, twitter me, or use any of the github issue / pull request tools.